TC: Final Hardware

Assembly

Once the USB cutout was enlarged, the case went together easily.  It’s a friction fit, so it required a bit of elbow grease to assemble, but was otherwise trouble-free.  A warning, however:  it’s very easy to crack the acrylic while fitting everything together!

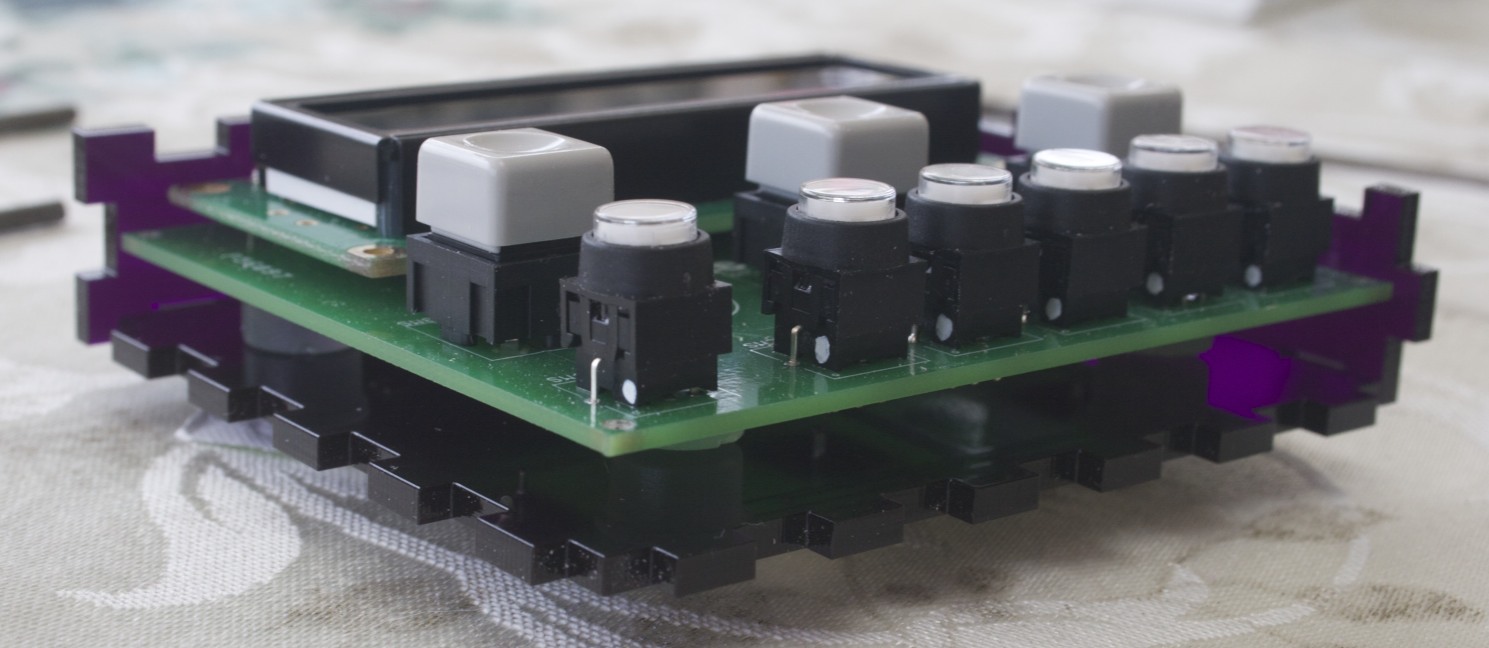
The half-assembled TuneConsole. The rubber feet on the bottom of the board are part of the design; They keep the components from resting against the case and raise the USB port to a more workable height.

Of course, I would have done things a bit differently were I designing this for manufacturing purposes.  The USB and ICSP connectors extend through the case on two adjacent sides, making it impossible to pre-assemble the box, drop the board in, and slap the top on.  I had to build the case around the board instead.

Not a big deal for a one-off, but it would probably make it more difficult to build ’em on an assembly line.

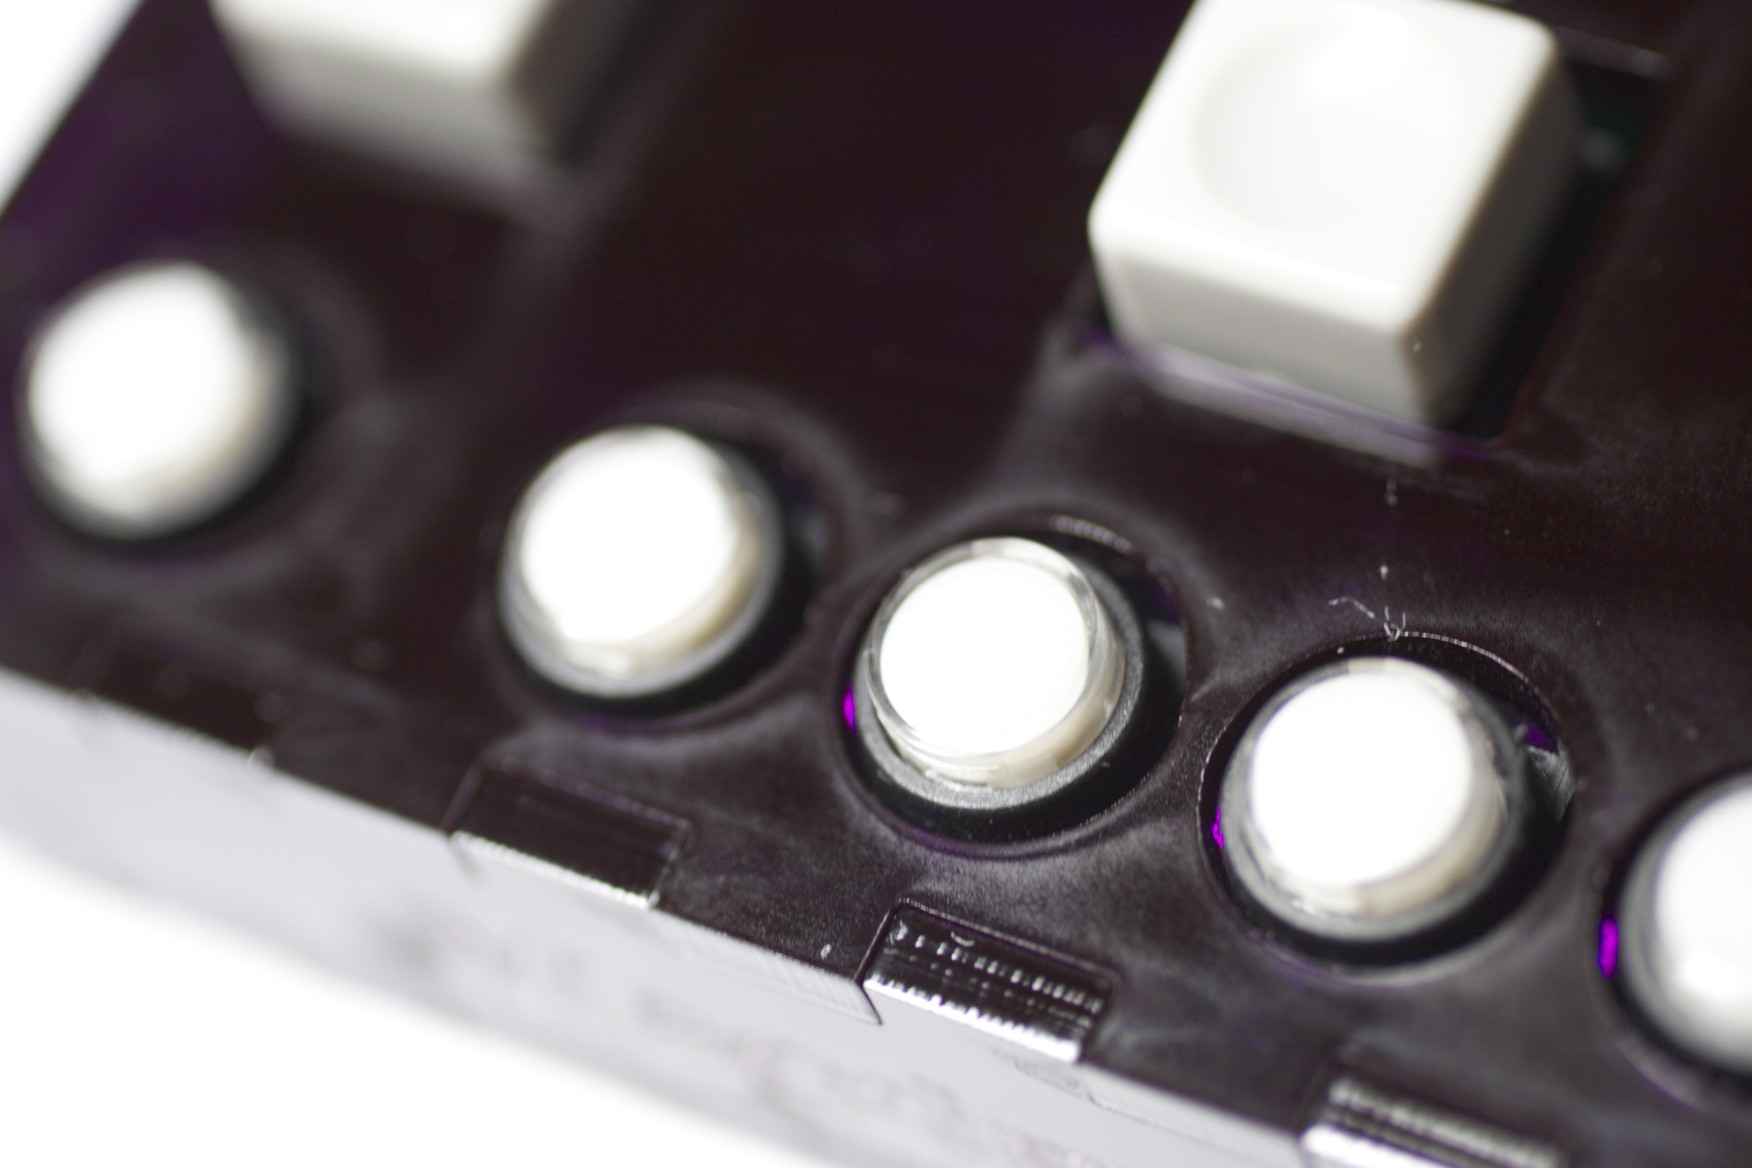
The artifacts from the laser cutting are easily visible.

In the end, my only complaint is the presence of visible artifacts from the cutting process.  The heat from the laser left the area around the cuts dull, likely from where the acrylic melted just a little.  I’m not sure if this is the process itself or Ponoko’s implementation of it, but it detracted somewhat from the look of the case.

The engraving, on the other hand, came out beautifully.  I was expecting it to be iffy at best, but it’s sharp and perfectly readable.

With the case assembled, the final step was to slap a couple of rubber feet on the bottom at the back of the box.  The feet keep it from sliding on the desktop when buttons are pressed, and the absence of same at the front gives the face a slight angle, which makes the display more readable.

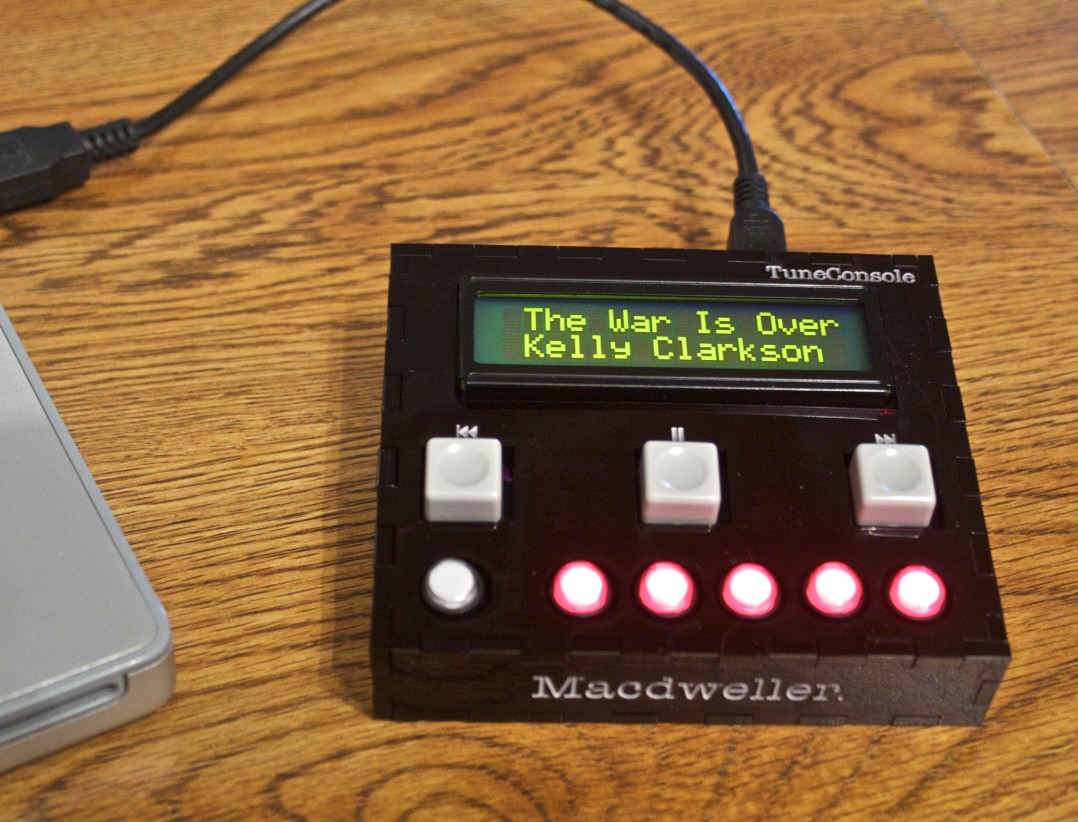
The completed console.

Overall, I’m quite pleased with it.  I was expecting a press-fit acrylic design to produce something that would fall apart easily, but it’s surprisingly solid and looks like a halfway professional product.  Now I just have to eliminate a few firmware bugs and add a couple of features, and the project will be completed!

Oh, and I need to pull the buttons apart and stick some legends under the plastic, but that’s neither here nor there.

I’m currently debating a release of the design to the open hardware community (though I might have to switch out the USB stack; I haven’t looked at the MAL license just yet, so I don’t know if it can be redistributed).  If you’re interested, leave a comment here; it’ll go a long way toward enticing me to take the time to do it.

S.

About Steve

When it comes to the desktop, Steve is a former Amiga, Windows, and Linux user, and as of six years ago, a die-hard Mac head (who, for once, isn't thinking of changing platforms again any time soon). When it comes to the server, Linux is pretty much the only game he plays. He also enjoys hardware hacking, and shouldn't be allowed near a keyboard after the sun sets (or for that matter, after it rises. Don't say I didn't warn you).
This entry was posted in Hardware Hacking, TuneConsole. Bookmark the permalink.

13 Responses to TC: Final Hardware

  1. Pingback: An iTunes rating box for everyone - Hack a Day

  2. Pingback: An iTunes rating box for everyone » Geko Geek

  3. Pingback: An iTunes rating box for everyone « vis a vis | visual mind

  4. Pingback: An iTunes rating box for everyone « Hackaday « Cool Internet Projects

  5. Dihydro says:

    Please, please release this as open source! I have been looking for a project like this!

  6. Malcolm says:

    I really like what you did here – are you thinking about producing a kit, opening it up or something?

    • Steve says:

      My current thought is to design a second, lower-cost version (this one is quite expensive to build) and offer it either as a kit or a finished product (or both). Haven’t made any decisions though, so I’m open to suggestions. :)

      • Dillon says:

        I’d prefer a kit (or even a PCB and links to the parts on digi-key or something) to a finished product. Lower cost sounds good to me!

        • Steve says:

          I’ll certainly keep that in mind. As an aside, I just posted the Eagle design files over on DP (we’ll see if they decide to use them for the video); feel free to take a peek.

          The firmware source is still a problem; I don’t think the MAL license allows redistribution. I’ll probably switch it out with the DP stack at some point.

          How much would you be willing to spend on parts to build something like this as a kit? My biggest concern is the expense involved in the buttons; those are $30+ on their own. I’m looking for lower-cost solutions, but the one I’ll likely end up with will be a while in coming.

  7. Andy says:

    Nice execution!

  8. Audrey says:

    This is a really awesome project! I am a site manager on Instructables.com. You should consider submitting this as an entry to our Make It Real Challenge. We’re giving away over $100k in 3D printers.

    link -> instructables.com/contest/maketireal

    I would be happy to feature it on our site if you decide to post the instructions there and help get it noticed among our 13.8 million viewers. Let me know if you have any questions!

    Cheers!
    Audrey
    audrey@instructables.com

    • Steve says:

      I’ll keep it in mind, thanks! There’s a license issue with the firmware at the moment, however, so I unfortunately probably won’t make the deadline for the contest. :-(

  9. website says:

    Very rapidly this site will be famous amid all blogging and site-building viewers, due to
    it’s fastidious posts

Comments are closed.